

How to Customize Navigation Bar in Android Oreo (Guide)
Android Oreo has been officially unveiled and like always, information technology brings a ton of changes and upgrades which we already saw in its programmer beta. Yet, as you lot know, not every feature present in the developer beta makes it to the final release. In the case of Android Oreo, one of my favourite features was dropped with its final release. The feature I am talking near is the ability to customize the navigation bar. At present, it'southward not totally gone, in fact, it was nowadays in Android since the release of Android Nougat. However, the feature was hidden and came to surface simply with the developer beta of Android Oreo. Now, with the public release, the feature once once more is hidden and cannot be accessed directly from the Settings page.
Merely, since we know that the feature already exists, we tin enable it using a little chip of tweaking, and that too, without rooting our Android device. So, if customizing navigation bar was something you really desire to do on your Android Oreo device, here is how you tin can customize the navigation bar in Android Oreo without root access:
Note: Although this tutorial has been written from the perspective of Android Oreo, information technology will also work with Android Nougat. This is because the characteristic was introduced with Android Nougat albeit in a hidden form.
Prerequisites For Customizing Navigation Bar in Oreo
1. Enabling USB Debugging
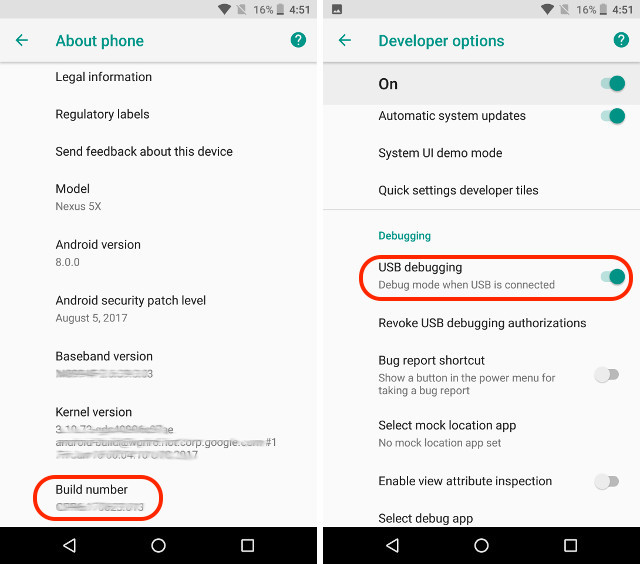
This is the easiest step and many of y'all might already know how to do information technology. For the uninitiated, merely to go to Settings->Virtually Phone->Build Number and tap on it 7 times. This enables the Developer Options. Now get to Developer Options (It will be on the master settings page) and enable "USB Debugging".
2. Installing the Custom Navigation Bar App
For getting the ability to customize the navigation bar on our Android phones, we will have to take the assistance of a third party app, that is Custom Navigation Bar app (install). The app is free to utilise with ads. Y'all can go the pro version ($1.99) which removes the ads and gives you admission to actress themes (more on that later).
3. Installing the Android Debug Tool (ADB)
As I mentioned earlier, although the power to customise the navigation bar exists in Android Oreo, its setting has been hidden within the OS. To make use of the hidden settings, we will take to utilise a tool called the ADB. Y'all will demand a desktop to run ADB commands on your Android device. Yous tin can employ both Mac or Windows to run the ADB commands. Only, earlier y'all can do that, you lot will have to install the ADB tool on your desktop.
Installing ADB on Mac
Firstly, open up Terminal on your Mac. Now paste the following command and press return/enter.
/usr/bin/ruby -e "$(roll -fsSL https://raw.githubusercontent.com/Homebrew/install/primary/install)":
Now paste the following control and hit enter/return. This volition install the ADB on your Mac.
brew cask install android-platform-tools
Installing ADB on Windows
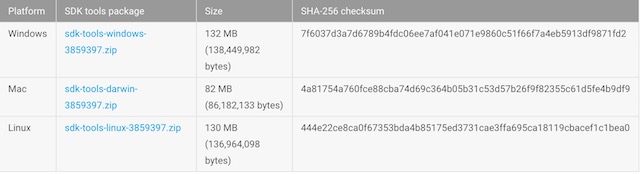
To install ADB on Windows, go to Android SDK download folio and scroll down to the lesser. Click on the link shown in the motion picture and download the zip file. Extract the zip file and run the .exe file. Deselect everything other than "Android SDK Platform-tools" and then click Install. This will install the ADB tool on your PC.
Customizing Navigation Bar in Oreo
Now that nosotros are done with the preparations, permit the states continue with the procedure of customising the navigation bar on your Android.
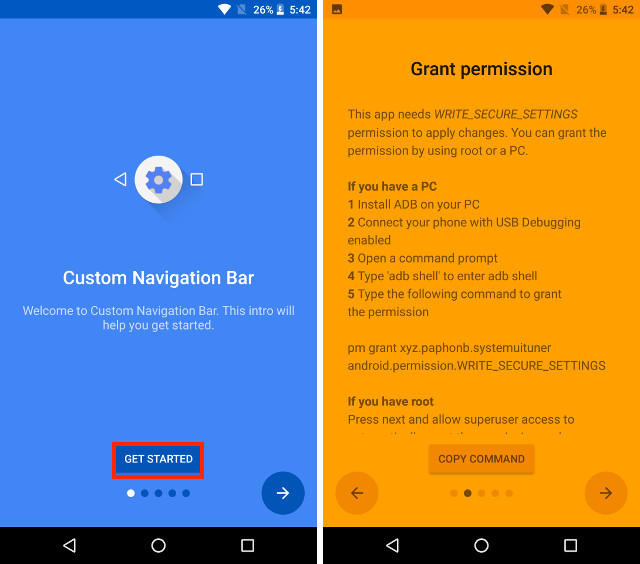
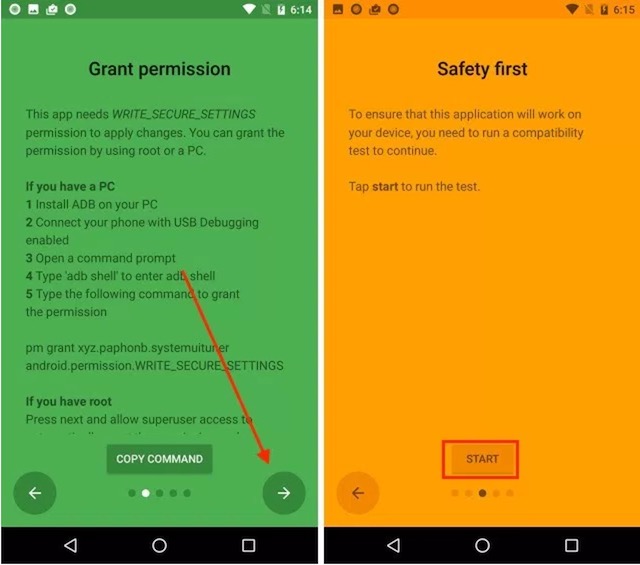
i. Launch the "Custom Navigation Bar" app on your telephone and tap on the "Get Started" button. The side by side page will show you all the steps that you crave to give the requisite admission to the app.
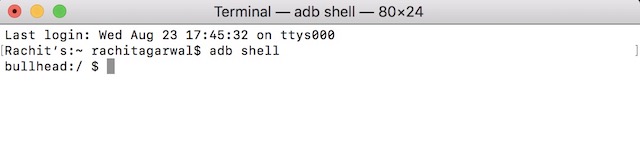
2. With USB Debugging enabled connect your telephone to your Desktop running ADB. One time connected launch the Terminal (Command Prompt for Windows users) and copy paste the following command and hit enter.
adb shell
three. Now we will grant permission to the app which will allow united states of america to customise the navigation bar using it. To practice that only re-create and paste the following control and hit enter/return.
pm grant xyz.paphonb.systemuituner android.permission.WRITE_SECURE_SETTINGS

4. Every bit presently as you run this command, you volition see that the app page color will turn to light-green from yellow. This ways that now the app has the access that it needed. Now tap on the right arrow button and on the next page tap on "Start".
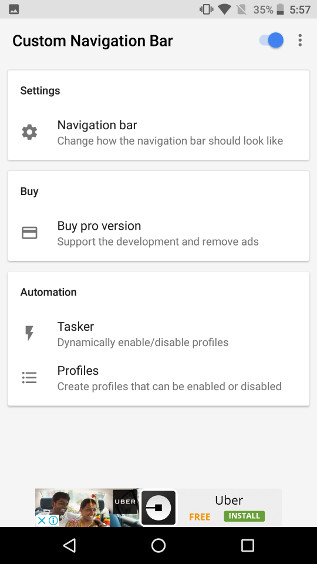
5. Borer on Outset button runs a compatibility test on your device. Subsequently its done running, hit the side by side pointer till you achieve the App's dwelling house page which should look like the picture below.
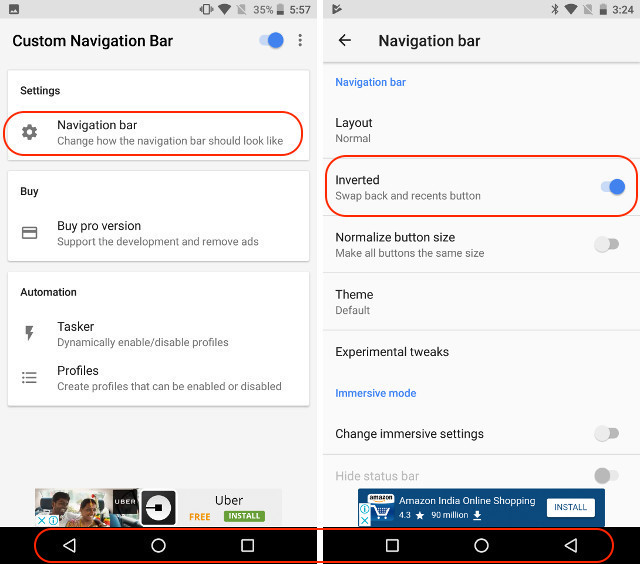
half dozen. Now, tap on the "Navigation bar" option. Here you tin see a list of changes that you can make with this app in your navigation bar. For instance, you can capsize the dorsum and the recents button, change their size and so on. As yous can see in the picture below, I have inverted the back and the recents button on my phone.
vii. There are a lot of changes that you can brand here. Allow's take a elementary one for case. You lot can change the expect of your navigation bar by going into Themes. Here you volition run across a listing of different styles of navigation buttons that you can employ. However, this is a pro setting and y'all volition accept to pay for information technology.

8. Another cool thing we can do, is that, nosotros tin can add two actress buttons in the navigation bar. It is very simple to practice that. Go back from the "Theme folio" to the main page and scroll down to notice the "Extra left button" and the "Extra right button" options. Let's first add the left button. Tap on "Type" and and then select your button type. I am going to create a navigation button which volition allow me to pull downward the navigation shade.
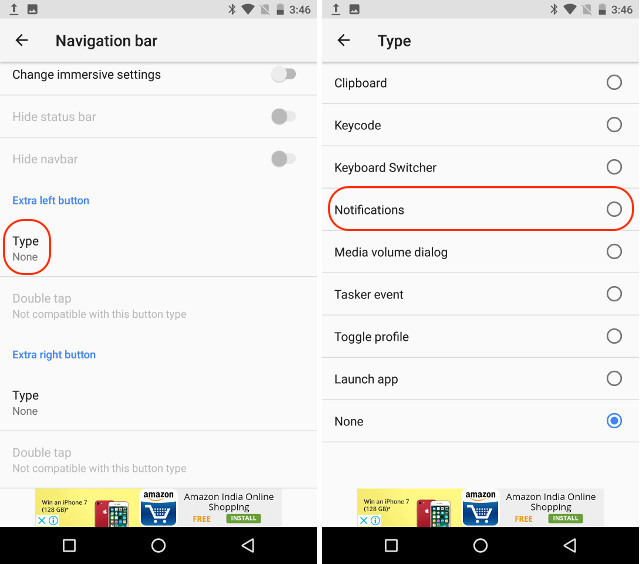
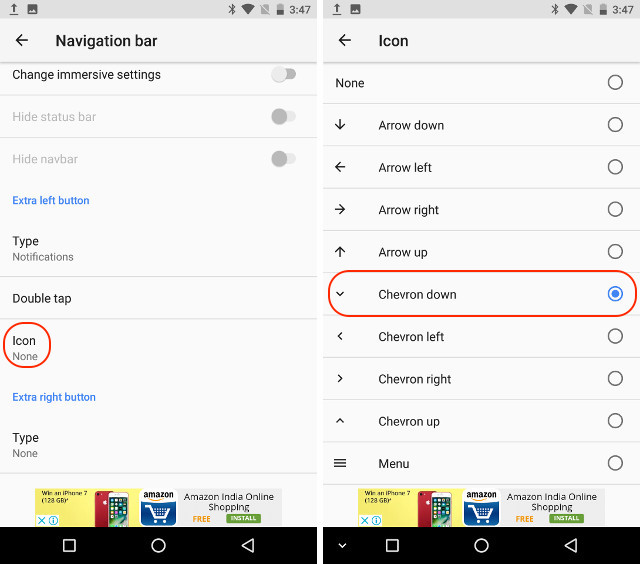
9. At present we will chose the push icon. Equally soon equally you select the push blazon, you will encounter the choice to chose its icon. Tap on information technology, and select the icon that you want. I am going to chose "Chevron down" as the down arrow will remind me of its function.
10. Similarly, you can likewise create one more than button (extra right button) which will show upward at the far right side in the navigation bar. Wait at the beneath picture show to see how information technology looks, when I activate both the buttons.

Run into More than: How to Enable Android O Like Notification Dots on Whatsoever Android Device
Change Theme and Set Custom Navigation Bar Buttons in Android Oreo
Android Oreo is a great update to the already mature Android operating system. Having said that, it still lacks a navigation bar customizer, something which I was hoping for. Thankfully, there are other means to customize the navigation bar in Android Oreo. Then, attempt out this method on your Android Oreo running smartphone and let us know your thoughts in the comments section beneath.

Source: https://beebom.com/how-customize-navigation-bar-android-oreo/
Posted by: trimmwasts1966.blogspot.com
0 Response to "How to Customize Navigation Bar in Android Oreo (Guide)"
Post a Comment